336x280(권장), 300x250(권장), 250x250, 200x200 크기의 광고 코드만 넣을 수 있습니다.


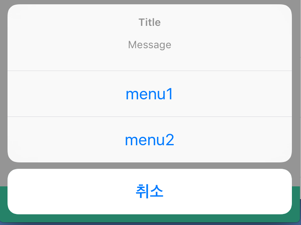
iPad에서 UIAlertController의 actionSheet사용시 발생하는 오류

오류 메세지

'Your application has presented a UIAlertController (<UIAlertController: xxx>) of style UIAlertControllerStyleActionSheet.
The modalPresentationStyle of a UIAlertController with this style is UIModalPresentationPopover.
You must provide location information for this popover through the alert controller's popoverPresentationController.
You must provide either a sourceView and sourceRect or a barButtonItem.
If this information is not known when you present the alert controller, you may provide it in the UIPopoverPresentationControllerDelegate method -prepareForPopoverPresentation.'

영어를 해석해보면 actionSheet의 모달스타일은 UIModalPresentationPopover라고 설명을 해주면서 UIModalPresentationPopover을 사용 할 때는 barButtonItem또는 팝업에 대한 위치를 설정해줘야 된다고 명시 되어 있습니다.

해결 방법

해결방법은 만약 앱이 iPhone과 iPad를 같이 지워하는 앱이라면 디바이스에 따라 분개해주고 iPad만 사용 가능하다면 따로 설정은 안 해주셔도 됩니다.

  • 위치를 정해주는 방법

    if UIDevice.current.userInterfaceIdiom == .pad { //디바이스 타입이 iPad일때
      if let popoverController = alertController.popoverPresentationController {
          // ActionSheet가 표현되는 위치를 저장해줍니다.
          popoverController.sourceView = self.view
          popoverController.sourceRect = CGRect(x: self.view.bounds.midX, y: self.view.bounds.midY, width: 0, height: 0)
          popoverController.permittedArrowDirections = []
          self.present(alertController, animated: true, completion: nil)
      }
    } else {
      self.present(alertController, animated: true, completion: nil)
    }
    
  • UIBarButtonItem에 추가해주는 방법

    if UIDevice.current.userInterfaceIdiom == .pad { //디바이스 타입이 iPad일때
      if let popoverController = alertController.popoverPresentationController {
          // ActionSheet가 표현되는 위치를 저장해줍니다.
          popoverController.barButtonItem = sender as? UIBarButtonItem에
          self.present(alertController, animated: true, completion: nil)
      }
    } else {
      self.present(alertController, animated: true, completion: nil)
    }
    

마치며

당연히 문제 없이 되는 줄 알았는데 뜻밖에 오류를 확인하고 당황했었습니다. 보통은 iPhone 작업만 하다보니 확인하지 못했던 문제였습니다. 그리고 뿜어내는 오류를 일단 해석하고 이해하는게 중요하다는걸 또 깨달았습니다.감사합니다. 틀린점이 물어보실게 있다면 댓글로 남겨 주시면 적극 반영하겠습니다.


'iOS 프로그래밍 > iOS 오류' 카테고리의 다른 글

Custom FrameWork Bulid error  (0) 2017.04.24
iOS 오류) ENABLE_BITCODE 오류  (1) 2016.06.21
iOS 오류) URL nil 오류 나는 문제  (0) 2016.06.21
336x280(권장), 300x250(권장), 250x250, 200x200 크기의 광고 코드만 넣을 수 있습니다.


UIAlertController - actionSheet

안녕하세요. 개발자 myoung입니다. UIAlertController에는 두가지 스타일 있습니다. actionSheet와 alert입니다. 오늘 포스팅 내용은 actionSheet에 대한 포스팅입니다. Alert가 알려주는 기능이었다면, ActionSheet는 주로 사용자에게 여러가지 선택 사항이 있을때, 간편하게 선택 할 수 있도록 하는 Controller입니다.

사용 환경

  • Swift3.x
  • Xcode 8.3.3

사용의 예

Alt text
<이미지 1>

사용 방법

가장 기본적인 사용 방법은 Alert과 별반 다르지 않습니다. 타이틀, 메세지에 원하는 텍스트를 넣어주고 UIAlertAction을 통해 선택 할 수 있는 항목을 정해주면 됩니다. 선택개수는 추가한 UIAlertAction 개수에 따라 선택 메뉴가 형성이 됩니다. ( 맨 아래에 취소 버튼을 안 추가 해주시면 무조건 선택을 해야 Controller가 지워지기 때문에 필요없지 않는 이상 넣어줍니다.)

let actionSheet = UIAlertController(title: "Title",
                                            message: "Message",
                                            preferredStyle: .actionSheet)
actionSheet.addAction(UIAlertAction(title: "menu1", style: .default, handler: { result in
           //doSomething
        }))
actionSheet.addAction(UIAlertAction(title: "menu2", style: .default, handler: { result in
            //doSomething
        }))
actionSheet.addAction(UIAlertAction(title: "취소", style: .cancel, handler: nil))
self.present(actionSheet, animated: true, completion: nil)

마치며

메뉴에 대한 개수는 따로 정해져 있지 않지만 많으면 많을수록 로딩(개발자 입장에서는 로딩이지만 사용자 입장에서는 순간 멈춘것처럼 느껴지죠)이 길어집니다. 메뉴가 많아지면 자연스럽게 테이블뷰 처럼 스크롤이 가능하게 됩니다. alert 스타일보다는 활용도가 많다고는 할수 없지만 작은 화면 많은 것을 표현해야되기 때문에 선택메뉴는 이런식으로 많이 구현을 하게 됩니다. 이것또한 커스텀보다는 쉽게 구현 할 수 있기 때문에 디자인이 문제가 되지 않는다면 이런식으로 사용하는것도 나쁘지 않는거 같습니다. 이번 포스트는 여기까지입니다. 틀린점이나 궁금한점이 있다면 언제든지 댓글을 남겨주시면 감사합니다 :)


'iOS 프로그래밍 > iOS' 카테고리의 다른 글

iOS) EUC-KR 인코딩 하기  (0) 2017.09.18
iOS) 카카오 API를 통해 웹 이미지 검색하기  (2) 2017.09.13
iOS) UIAlertController - alert  (0) 2017.07.11
iOS)UIActivityViewController  (0) 2017.06.15
iOS) JSON 타입 활용하기  (0) 2017.05.16
336x280(권장), 300x250(권장), 250x250, 200x200 크기의 광고 코드만 넣을 수 있습니다.


UIAlertController - alert

안녕하세요. 개발자 myoung입니다. UIAlertController에는 두가지 스타일 있습니다. actionSheet와 alert입니다. 오늘 포스팅 내용은 alert에 대한 포스팅입니다. Alert은 주로 사용자에게 변경 사항이라던지 여러 알림을 알려주기 위해서 사용됩니다.


사용의 예

Alt text
<이미지 1>

Alt text
<이미지 2>


사용 방법

가장 기본적인 사용 방법입니다.다. 타이틀, 메세지에 원하는 텍스트를 넣어주고 취소버튼, 확인 버튼을 통해 실행 하고자 하는 부분을 실행 하시면 됩니다. 액션버튼을 하나 이상으로 해주시면 최대 몇개까지는 모르겠지만 그래도 따로 커스텀으로 만들지 않아도 편하게 Alert창을 만들어서 사용 할 수 있습니다.

let alert = UIAlertController(title: "타이틀", message: "메세지", preferredStyle: .alert)
let action_cancel = UIAlertAction(title: "취소", style: .default, handler: { result in 
                        //do something
                    })
alert.addAction(action_cancel)
let alert_done = UIAlertAction(title: "확인", style: .default, handler: { result in
                        //do something
                    })
alert.addAction(alert_done)
self.present(alert, animated: true, completion: nil)

텍스트 필드를 이용해서 <이미지2>와 같이 사용 하실 수 있습니다. 사용법은 아래와 같습니다.

let alert = UIAlertController(title: "타이틀", message: "메세지", preferredStyle: .alert)
alert.addAction(UIAlertAction(title: "취소", style: .default, handler: nil))
alert.addAction(UIAlertAction(title: "건너뛰기", style: .default, handler: { result in
    //do something
}))
alert.addAction(UIAlertAction(title: "확인", style: .default, handler: { result in
    let tf_title = alert.textFields![0] as UITextField
    print(tf_title.text)
}))
alert.addTextField { (textField : UITextField!) -> Void in
    textField.placeholder = "힌트입니다."
}
self.present(alert, animated: true, completion: nil)

마치며

alert은 정말 많이 사용됩니다. 물론 커스텀을 만들어서 사용되기도 하지만 대부분 기본으로 쉽게 사용 할 수 있는 컨트롤러중 하나임은 분명합니다. 여러가지로 신경써야 할 부분도 많이 줄어 들기도 합니다. (ex: 텍스트 필드를 사용 할 경우 키보드에 대한 대응..? ) 오늘 포스팅은 여기까지입니다. 다음 포스팅은 UIAlertController의 또다른 스타일인 actionSheet에 대해서 포스팅 하겠습니다. 틀린점이나 궁금한점이 있으시면 언제든지 댓글을 남겨 주시면 성실히 답변 드리겠습니다.


+ Recent posts